Apr 4, 2025
Essential Blender Settings for Optimal Performance
Guide

In the world of 3D modeling and animation, few things are more frustrating than a sluggish workflow. Whether you're a student exploring Blender for the first time or an experienced artist working on complex projects, optimizing your Blender settings can dramatically improve your experience. This guide walks you through the key settings to adjust for maximum performance without sacrificing quality.
System Preferences
Memory and System Settings
The foundation of Blender's performance begins in the Preferences panel. Access this by navigating to Edit > Preferences > System.
Memory: Blender lets you limit the memory cache for images, textures, and other data. As a general rule:
Set your texture memory to 4096 MB for systems with 8GB RAM
Increase to 8192 MB for systems with 16GB RAM
For 32GB+ systems, 16384 MB works well
Undo Steps: While the default 32 steps is reasonable, reducing to 20 steps can free up memory with minimal workflow impact.
CPU Threads: Blender automatically detects your processor capabilities, but manually setting this to leave 1-2 cores free can prevent system lockups during heavy rendering.

Viewport Settings
Performance Optimization
The viewport is where you'll spend most of your time, making its performance crucial:
Viewport Overlays: Toggle off unnecessary overlays through the overlay dropdown in the 3D viewport header. Particularly for complex scenes, turning off face orientation, statistics, and measurement can boost performance.
Simplify Option: In the Render Properties panel, enable "Simplify" and adjust the subdivision and child particle settings to reduce viewport complexity while modeling.
Solid View: Working in Solid view rather than Material Preview or Rendered view significantly reduces resource usage during modeling phases.
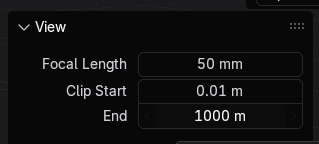
Clip Start/End: Adjust these in the View panel (N key) to focus only on relevant scene areas. Setting appropriate near and far clipping planes improves both performance and navigation precision.
Render Settings
Optimizing Cycles Rendering
Cycles, Blender's ray-tracing engine, offers photorealistic results but can be demanding:
Tile Size: For CPU rendering, smaller tiles (32×32 or 64×64) work best. GPU rendering benefits from larger tiles (256×256 or 512×512).
Samples: Use adaptive sampling with a noise threshold (0.01 for final renders, 0.1 for test renders) rather than fixed sample counts.
Denoise: Enable the OptiX or Open Image denoiser to achieve clean results with fewer samples, dramatically cutting render times.
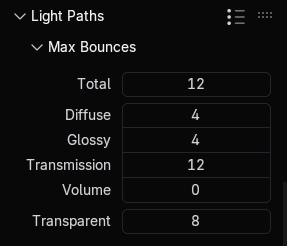
Light Paths: Unless you need caustics or other specific light effects, reducing the Max Bounces under Light Paths can significantly improve render times.
Eevee Optimization
For Eevee, Blender's real-time render engine:
Shadow Resolution: Set to 1024 for drafts and 4096 for final renders.
Ambient Occlusion: Enable for visual richness but reduce the distance parameter for better performance.
Screen Space Reflections: Use selectively as they're performance-intensive.
Organise your blender files for optimum workflow
Project-Specific Optimizations
Different project types benefit from specific optimizations:
For Animation Projects
Enable Persistent Data in the Performance section of Render Properties to cache BVH data between frames
Use Alembic caches for complex simulations
Consider the Simplify > Animation option to reduce particles during preview playback
For Large Environments
Use Collection Instances instead of duplicated objects
Enable View Frustum Culling in the Viewport settings
Implement Level of Detail (LOD) techniques with proximity-based modifiers
For Character Modeling
Use Subdivision Surface modifiers with "On Cage" enabled instead of applying them
Keep multires modifier levels as low as practical during sculpting
Enable Fast Navigate in the viewport navigation settings
Hardware-Specific Settings
NVIDIA GPU Users:
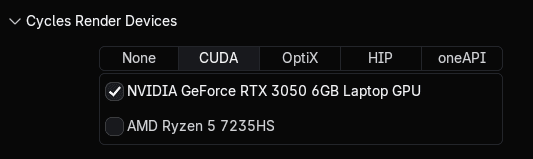
Enable OptiX in CUDA preferences if you have an RTX card
In some cases, selecting only your dedicated GPU (not integrated graphics) improves stability
AMD GPU Users:
Use HIP rendering where available
Ensure viewport draw mode is set to "Automatic" for best compatibility
Multiple GPU Systems:
Enable all compatible devices for rendering in Preferences > System > CUDA
Conclusion
Optimizing Blender is an ongoing process that evolves with your projects and hardware. These settings provide a solid foundation, but don't hesitate to experiment with configurations that might better suit your specific workflow. Remember that some settings trade visual quality for performance, so adjust according to your current task – use performance-focused settings during modeling and animation, then switch to quality-focused settings for final renders.
By taking the time to optimize these key areas, you'll experience a more responsive Blender that lets you focus on creativity rather than waiting for your computer to catch up.